We learned how to create spaces in Revit model. And how to define it for plenums and other areas. In this article, we will learn about zones. We create zones to group common spaces. Zones properties will provide data for heating and cooling load calculation.
There is always at least a zone in the Revit model. The default zone. If you don’t create zones, all spaces will be grouped into the default zone. When you create a zone, space will be removed from default zone.
Creating a Zone
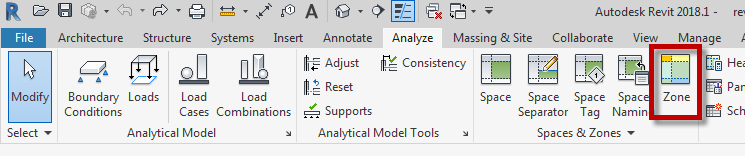
You can create a zone by using Zone tool on Revit ribbon> Analyze tab> Spaces & Zones panel.
Click the zone to activate the tool. You can see this contextual menu when the tool is active. You can add or remove spaces by choosing the appropriate tool.
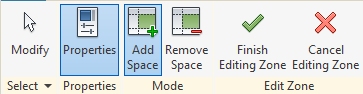
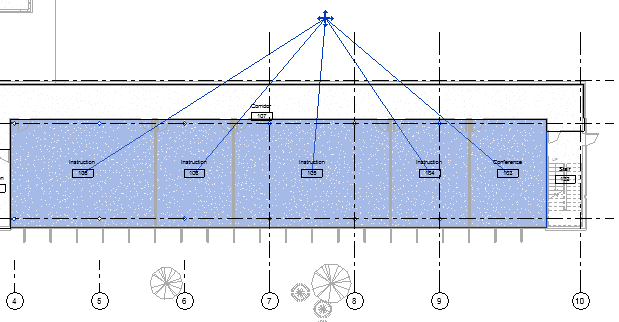
When you choose Add Space, you can see the badge on your mouse cursor.
Select common spaces then click Finish Editing Zone. Repeat the procedure to group all common zones.
Editing Zone
You can edit zone by selecting the zone and click Edit Zone on your Ribbon. It is a bit tricky to select a zone. You might want to move the handle to allow you select it easier later.
Edit Zone allows you to add more spaces or remove a space from your zone.
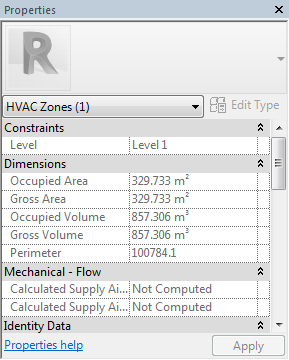
Zones have several properties that you can adjust to calculate the heating and cooling load accurately. Examine the properties and refer to the Knowledge Base for further details.
To Sum Up
In this tutorial, you learned how to create zones and modify it. Next, we will learn about Heating and Cooling Load Analysis in Revit.