In our Revit tutorial, we created plumbing and ducting design. We are going to continue working with the model by placing the lighting. If you are interested to follow the tutorial from the start, you can see the contents here: http://3dme.xyz/RevitMEP
If you want to skip the previous tutorial and only want to learn about electrical, you can download the file here.
We are going to place the lighting on the ceiling. And we will use the ceiling grids as the reference. So now we work in the ceiling plan.
Open the Revit model. In the Project Browser, under Views> Electrical> Ceiling Plan open 1-Ceiling Elec.
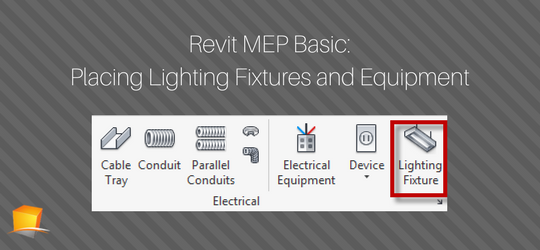
Placing Lighting Fixtures
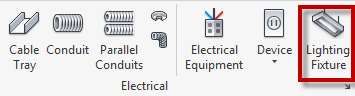
On Revit Ribbon> Systems tab> Electrical panel click Lighting Fixture.
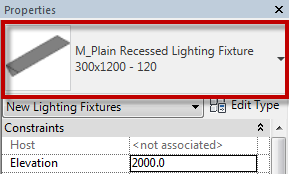
In Properties Palette, in the Type Selector, choose M_Plain Recessed Lighting Fixture 300×1200 – 120.
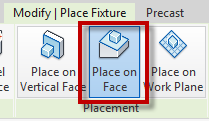
On the Ribbon, Contextual tab, Placement panel, click Place on Face.
Move your mouse to the ceiling grid. You can see the lighting preview now.
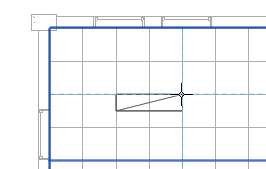
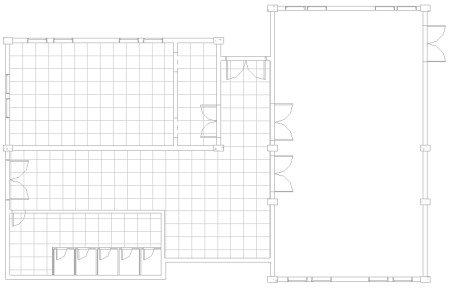
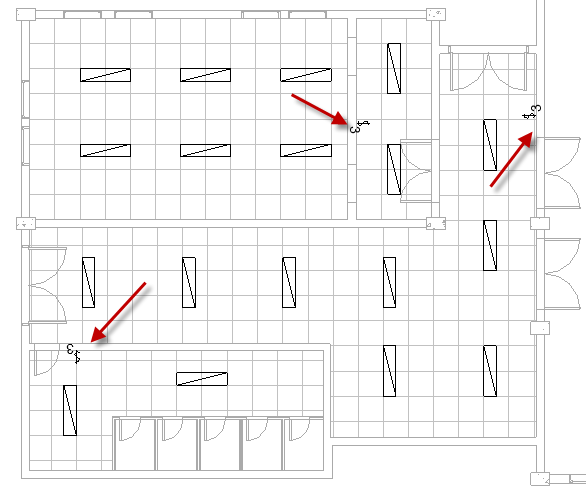
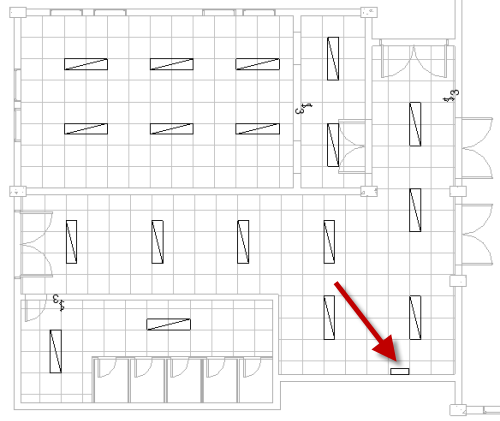
Place the light at the left top, approximately like the image above. Place more lighting by following the image below. The exact location of the lighting is not crucial.
Hint: Press the Space key to rotate the component during placement

Placing Switch
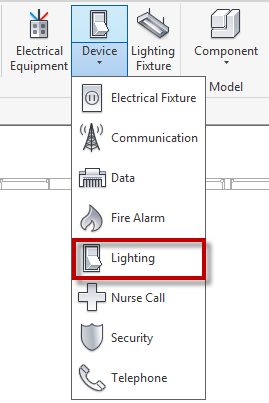
Next, place switches to the model. On Revit Ribbon> System tab> Electrical panel, click Device> Lighting.
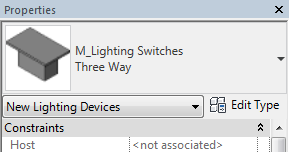
On the Type Selector, make sure the switch type is M_Lighting Switches, Three Way.
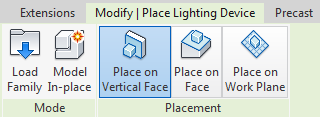
By default, the Placement method is Place on Vertical Face. We use it for placing the switches.
Place the switches like the image below.
Placing Panel
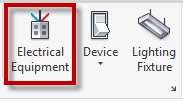
The last one is placing the panel. Click the Electrical Equipment tool.
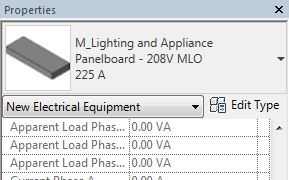
In the Type Selector, make sure you choose Panelboard – 208V MLO, 225 A.
Place the panel, use the image below as a reference.
Remember, press Space if you need to change the panel orientation.
We will continue creating the system in the next tutorial. If you have problems, please ask in the comment section.